Classic Sour Cherry Pie
Pie dough recipe adapted from "The Best Recipe" by the editors of Cook's Illustrated Magazine.
- Servings: Makes one 9-inch pie, which usually serves about 8.
This pie is like the ones that still win state fair baking competitions across America every summer. A generous filling of in-season sour cherries produces a fragrant and slightly complex sweet/bright flavor that's a perfect match with a simple, flaky and buttery crust.
You can either use your favorite pastry dough or our recipe which is from the editors at Cook's Illustrated Magazine. If you're not a frequent baker or have some trepidation about making a pie, try this with store-bought frozen pie dough found in your grocer's freezer case. It will still be wonderful.
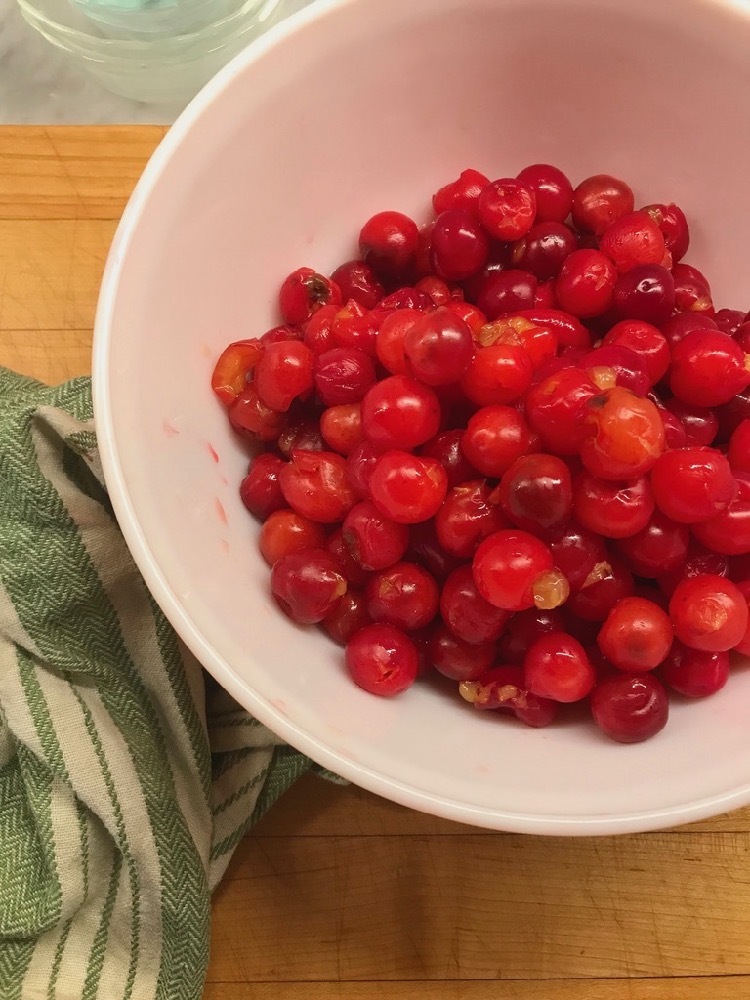
The main effort in making this pie is having to pit 2-quarts of fresh sour cherries. There are no short cuts to the effort of removing the stems and pits -- at least if you want to leave the cherries intact which is part of the pleasure and beauty of this pie. The best method we've found to cherry pitting is to use the end of a plastic drinking straw, gently pressed against the stem end of the cherry. This creates a slight rupture in the skin and lets you gently press out the pit, leaving the cherry still whole.
This pie should be made in a 9-inch regular Pyrex pie pan or a 9-inch deep dish pie pan.
Ingredients
- 2 1/2 cups all purpose flour
- 2 tablespoons sugar
- 1 teaspoon salt
- 12 tablespoons (1 1/2 sticks) unsalted butter, very cold, cut into 1/2-inch pieces
- 8 tablespoons all-vegetable shortening (Crisco's no transfats is excellent) or leaf lard
- 6 to 8 tablespoons iced water (this is approximate; you may need more)
- 6 to 8 cups pitted sour cherries
- 1 cup sugar
- 3 tablespoons tapioca
- 1 teaspoon grated lemon zest
- 1/4 teaspoon cinnamon
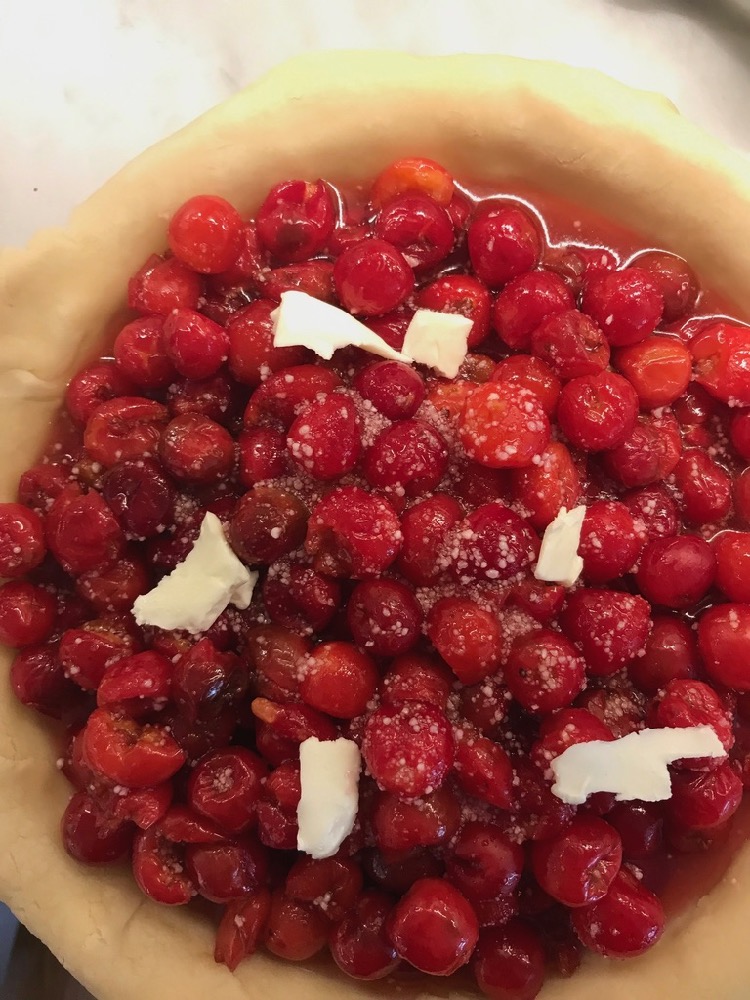
- 2 tablespoons unsalted butter, cut into small bits
Directions
- Make the pie dough first. Place the flour, sugar and salt in the basket of a food processor. Pulse once to combine.
- Sprinkle the diced cold butter over the flour mixture. Plus 4 or 5 times, one second for each pulse, to combine. Add the pieces of shortening or leaf lard and again pulse, until the mixture resembles corn meal. Do not over-mix.
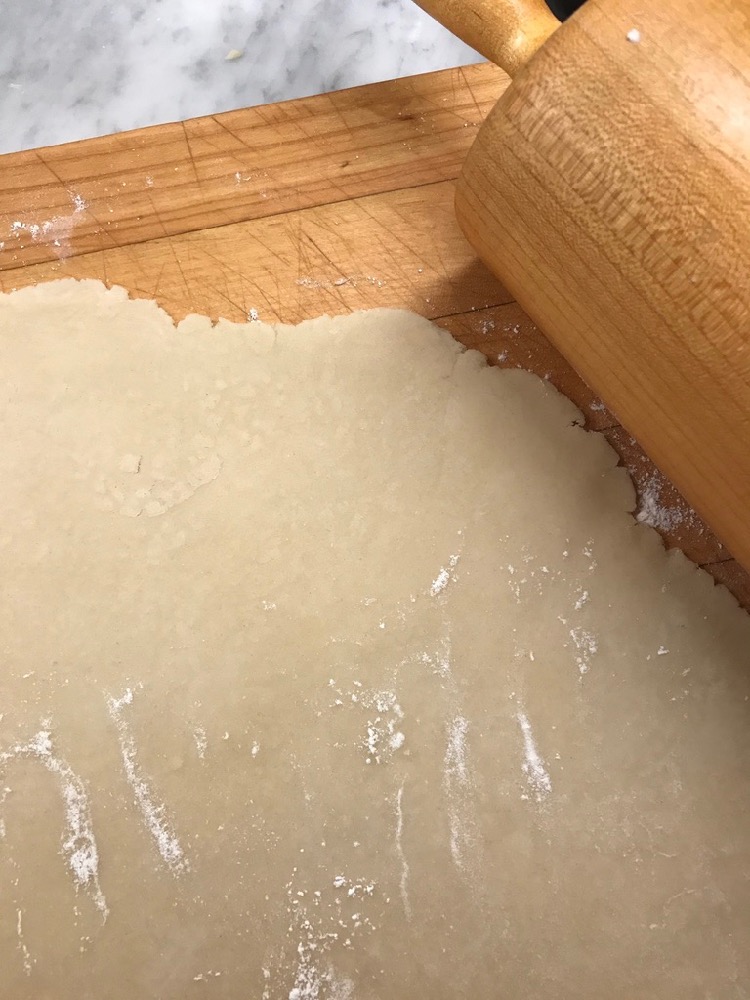
- Transfer this mixture to a large mixing bowl and add the ice water, a tablespoon at a time, and with a fork combine until large clumps form and the dough starts to hold together. If you need more than 6 tablespoons, sprinkle additional ice water gradually, in tiny amounts so that you don't get it too wet (although if this happens, don't panic; just gather up the finished dough and pat it with small amounts of extra flour until it achieves a tender, workable consistency). Adding the ice water by hand and not all at once in the food processor gives you vastly more control and a better, flakier result.
- Gather the dough into a ball, cut it into two pieces of about equal size, flatten the pieces each into a disc, wrap in plastic wrap and chill in the refrigerator for about a half-hour. (You can make the dough up to a day in advance, keeping it in the refrigerator.
- When you're ready to make and bake the pie, preheat the oven to 375º F and position the rack to the center of the oven.
- Remove the dough from the refrigerator. If it's too stiff to work with, let it sit until it softens enough to be malleable and workable.
- Roll out one piece of dough to form the bottom crust, a disc about 12-inches in diameter, or 1-inch larger than the outside diameter of the pie dish. Transfer the dough into the pie plate by rolling the dough over your rolling pin, using the pin to move the dough over the plate, then unrolling the dough into the pie plate, letting the excess dough overhang the edge of the pan.
- Prepare the fruit by combining in a large mixing bowl the pitted cherries (double-check to make sure all the pits have been removed!) with the sugar, cinnamon, grated lemon zest, and tapioca. Let the mixture stand for about 10 minutes so it begins to get juicy.
- Turn the fruit mixture into the pie pan that's been lined with the pie dough. Scatter the bits of butter over the fruit. Refrigerate while preparing the top dough.
- Take the remaining disc of pie dough and roll it out to the size of the pie dish, plus 1-2 inches. You want a top rolled-out circle of dough to cover the top completely, including any mounding from the fruit piled into the plate, as well as enough of an excess to seal the pie.
- Place the dough on top of the filled pie and trim the top and bottom edges of the dough to be 1/2 inch beyond the rim of the pie plate. Press the two together to seal and fold this edge under itself so that the dough is flush with the edge of the pan. Either flute with your fingers or use a fork to press the edge together.
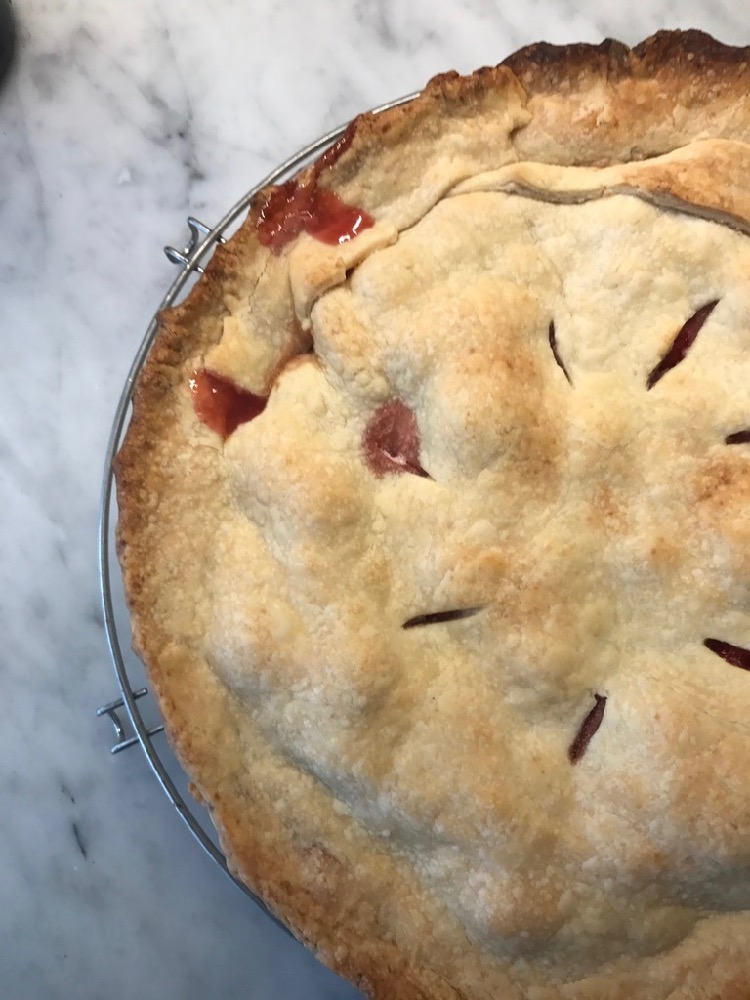
- Cut 4 steam slits on the top of the pie.
- If your kitchen is warm or the pie dough has otherwise softened, place the pie in the refrigerator or freezer for about 10 minutes before baking to re-firm.
- Put the finished pie on a rimmed sheet pan or cookie sheet (this is to catch any juices that may drip from the pie) and place in the middle of the pre-heated oven and bake about 20 minutes, until the top is golden brown.
- Reduce the oven temperature to 350º F and continue to bake about an additional 30 to 40 minutes until the juices are bubbling and the crust is golden brown.
- Remove from the oven and let cool almost completely (about 2 hours) before cutting. This is to let the juices thicken a bit.
Tip: If you already have a favorite pastry dough recipe, use that, making the equivalent for 2 crusts.
This pie is best eaten the day it's cooked but leftover pie for breakfast is always a treat.