Focaccia
Easy, Quick and Versatile
- Servings: 1 large flat loaf.
Many years ago I had the fun and privilege of taking two classes with the late Jack Ubaldi, a master butcher and one of the founders of the legendary Florence Prime Meat Market in New York's Greenwich Village. While most of our time was spent cooking meat and poultry, at the start of our second class Jack quickly made the dough for a focaccia, a thin yeast bread he had eaten growing up in the Umbrian region of Italy. The class was four hours, which meant that his simple dough had enough time to be transformed into a yeasty, warm and satisfying companion to the meat dishes we'd soon make.
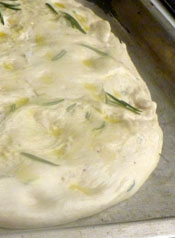
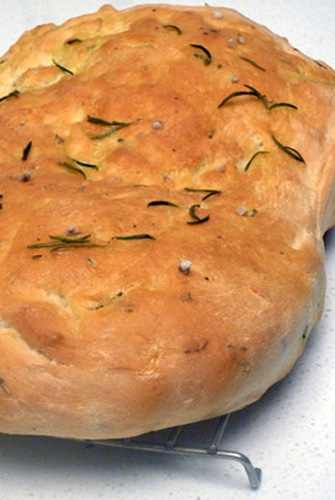
Focaccia is cooked on a sheet pan or cookie sheet and cooks to have a bumpy, uneven surface but a tender interior. It's thin enough to be used in a sandwich or panini, it can be topped and baked like a pizza, and can be cut into pieces and used for dipping or topped like a crostini. It's the kind of bread that really tastes best within an hour out of the oven. And if you've never baked bread before, it's a perfect first.
While relatively quick to assemble, focaccia is a yeast dough that needs time to rise, which means this recipe is better to try on a weekend. If you have a stand mixer with a dough hook, or a food processor with a plastic blade, the kneading is a non-issue.
If you want to flavor the bread, you can add a cup of finely chopped onions, or a 1/2 cup of minced prosciutto, or little diced pieces of provolone cheese to the dough after the first rise but before the second.
Ingredients
- 1 1/4 oz. (7 g) package active dry yeast (Fleishmann's or Red Star are both good)
- 1 tablespoon sugar
- 1 1/2 cups water
- 4 cups all-purpose flour
- 3 teaspoons salt
- 1/2 teaspoon black pepper
- The leaves from 2 sprigs of fresh rosemary, lightly chopped (about 2 teaspoons)
- About 3 tablespoons extra virgin olive oil (some for the dough, some to oil the bowl, some to oil the pan, and a little to drizzle on the finished bread)
Directions
- Warm 1/2 cup of water to 110° F (I use my instant meat thermometer to test the temperature). Add the sugar and sprinkle the yeast over the surface of the water. Let it sit for about 15 minutes during which time the yeast will dissolve and begin to foam.
- If you are using an electric mixer, attach the dough hook and add the flour, salt, pepper and rosemary leaves to the mixing bowl. Run the machine for a minute to combine. With the machine at low speed, gradually add both the remaining cup of water plus the water and yeast mixture, taking care to remove all the yeast with a spatula. Mix until everything is combined. The dough will seem dry.
- Add 1/2 tablespoon of the olive oil (about 1 1/2 teaspoons). Let the mixer continue to run at low speed, kneading the dough for 10 minutes until it is smooth and glossy (it will not be sticky).
- If you are using a food processor, equip the machine with its plastic blade and follow the same steps as for the electric mixer, but limit the kneading to only 5 minutes.
- Add a little olive oil to a large bowl and with your fingers rub the oil on the interior surface. Remove the dough from the mixer or food processor, gather it into a large ball and put into the bowl, turning it once or twice so that the dough's surface gets slightly oily. Cover with plastic wrap, place in a slightly warm, draft-free place, and let the dough rise until it has doubled in size. Depending on the warmth of the room, this could take 1 to 2 hours.
- Remove the plastic and while the dough is still in the bowl, use your fist to punch it down, deflating it. Remove from the bowl and knead the dough by hand for a few minutes. If you are adding onions, prosciutto, cheese or any other flavoring to the bread, this is the time to do so, kneading the ingredients so that they are distributed throughout the dough.
- Return to the mixing bowl, cover again with plastic wrap and let rise a second time. This rising will take less time, about 45 minutes.
- When the dough has again doubled in size, do not punch it this time -- it will deflate a little as you handle it but don't worry. Lift it out of the bowl and place it onto a lightly oiled cookie sheet or rimmed sheet pan. Using the tips of your fingers, spread the dough out as if you were arranging a pizza dough but in the shape of a long flat loaf, about 6 by 18 inches. Once the dough is in place, continue to use your fingertips to stipple the surface, creating little indentations. Drizzle one or two tablespoons of olive oil on the surface. Let it rest for 15 minutes.
- In the meantime, preheat the oven to 375° F. Before adding to the oven you can sprinkle a few pinches of coarse sea salt or additional rosemary leaves. Bake on the oven's bottom rack for 15 minutes and then raise up to the upper rack for another 10 to 15 minutes until the surface is golden brown and crispy and when you tap it, the loaf sounds hollow.
- Remove from the oven and transfer the bread from the pan to a rack for cooling.
It's true that most cities have wonderful bakeries and if you're lucky, as we are in New York, you can find artisanal breads still baked in wood fired ovens. But sometimes we want the flavor, warmth and aroma that can only come from baking our own. So if you're home this Sunday, while watching TV or catching up on the week's newspaper, start your bread dough and let it rise. Maybe also make a pot of butternut squash soup.


